Home Network Upgrade
In the midst of the pandemic & extensive WFH, I decided to upgrade my home network: Since I went with a totally overkill setup resulting in several people being curious about it, I wrote this blog post describing what I've built & why, what challenges I had and what I learned throughout the process.
Disclaimer: I'm not a professional (physical) networking engineer or technician: I don't have any CCNA or CCNP -certifications or similar, I'm just a hobbyist: So don't take this blog post as an absolute gospel you should follow yourself, instead this is a story on how & why I've set up my home network. Also, I don't recommend this setup for anyone's home – unless you're a hobbyist like myself who enjoys this stuff. Before you go on and question some of my choices, read the FAQ section at the end of this page!
Rack Cabinet 
Instead of storing all the gear hidden into some closet, I wanted to have an exposed rack cabinet visible in the room. Because I like looking at this kind of gear 🤓 The rack is mounted into an Ikea Fjällbo cabinet (which apparently is not sold anymore). The cabinet is actually located behind me (when I sit in front of my desk), making it also a nice background for video calls!
At the moment the rack only has 3x 1U units in place companied by 1x 1U shelf. I'd like to have some 1U or 2U Raspberry Pi rack mount unit, but they are quite expensive so not just yet! The main idea here – with both empty rack slots and extraneous cabling – was to have a lot of expandability for future needs!
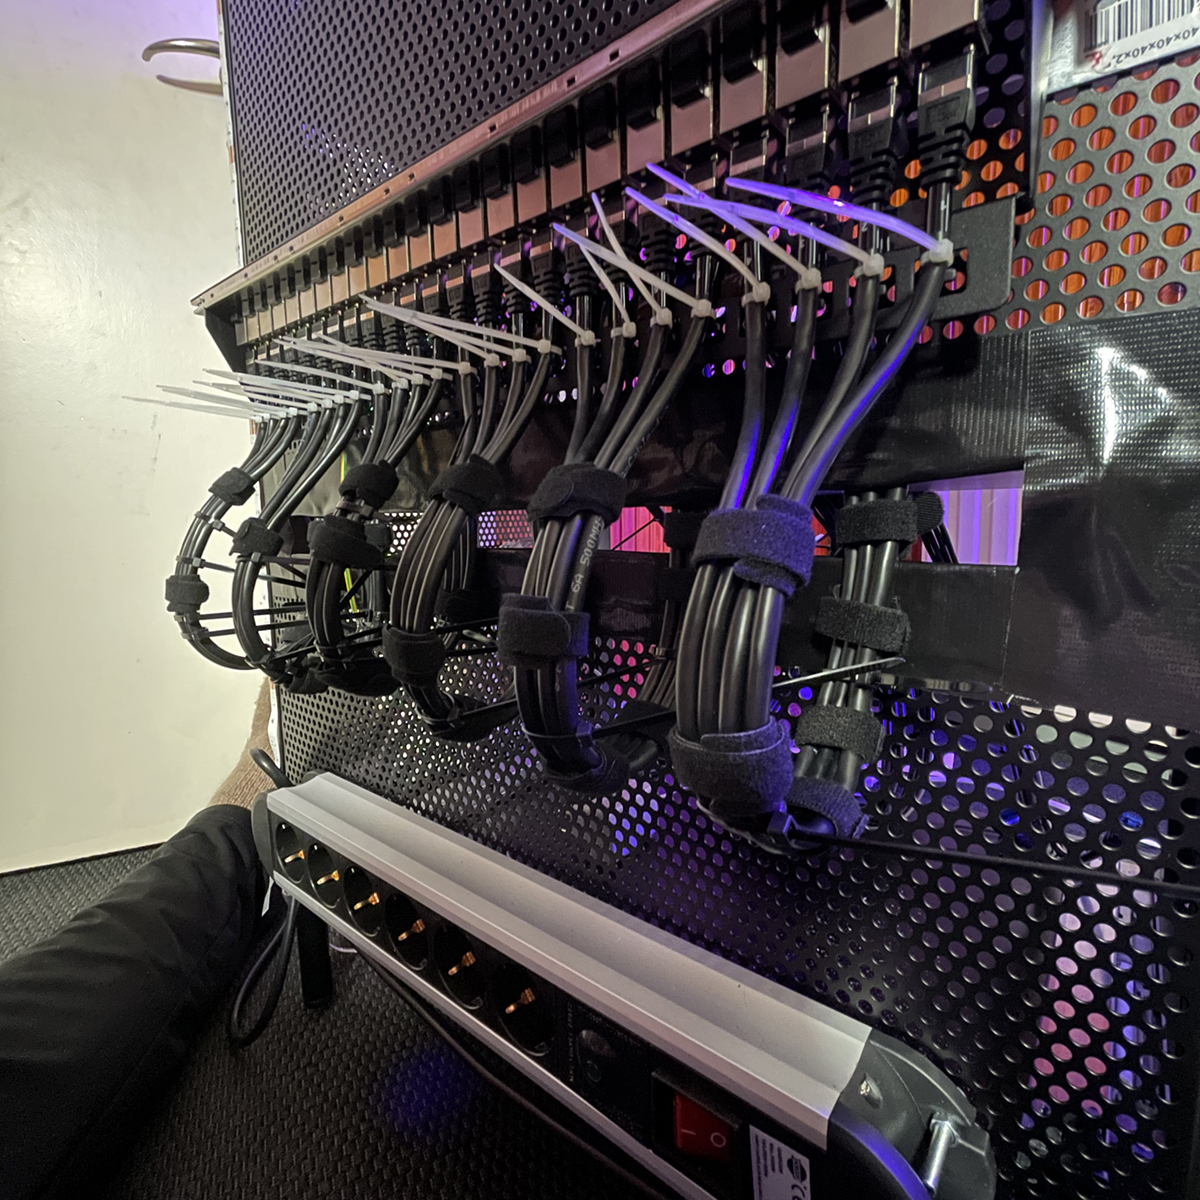
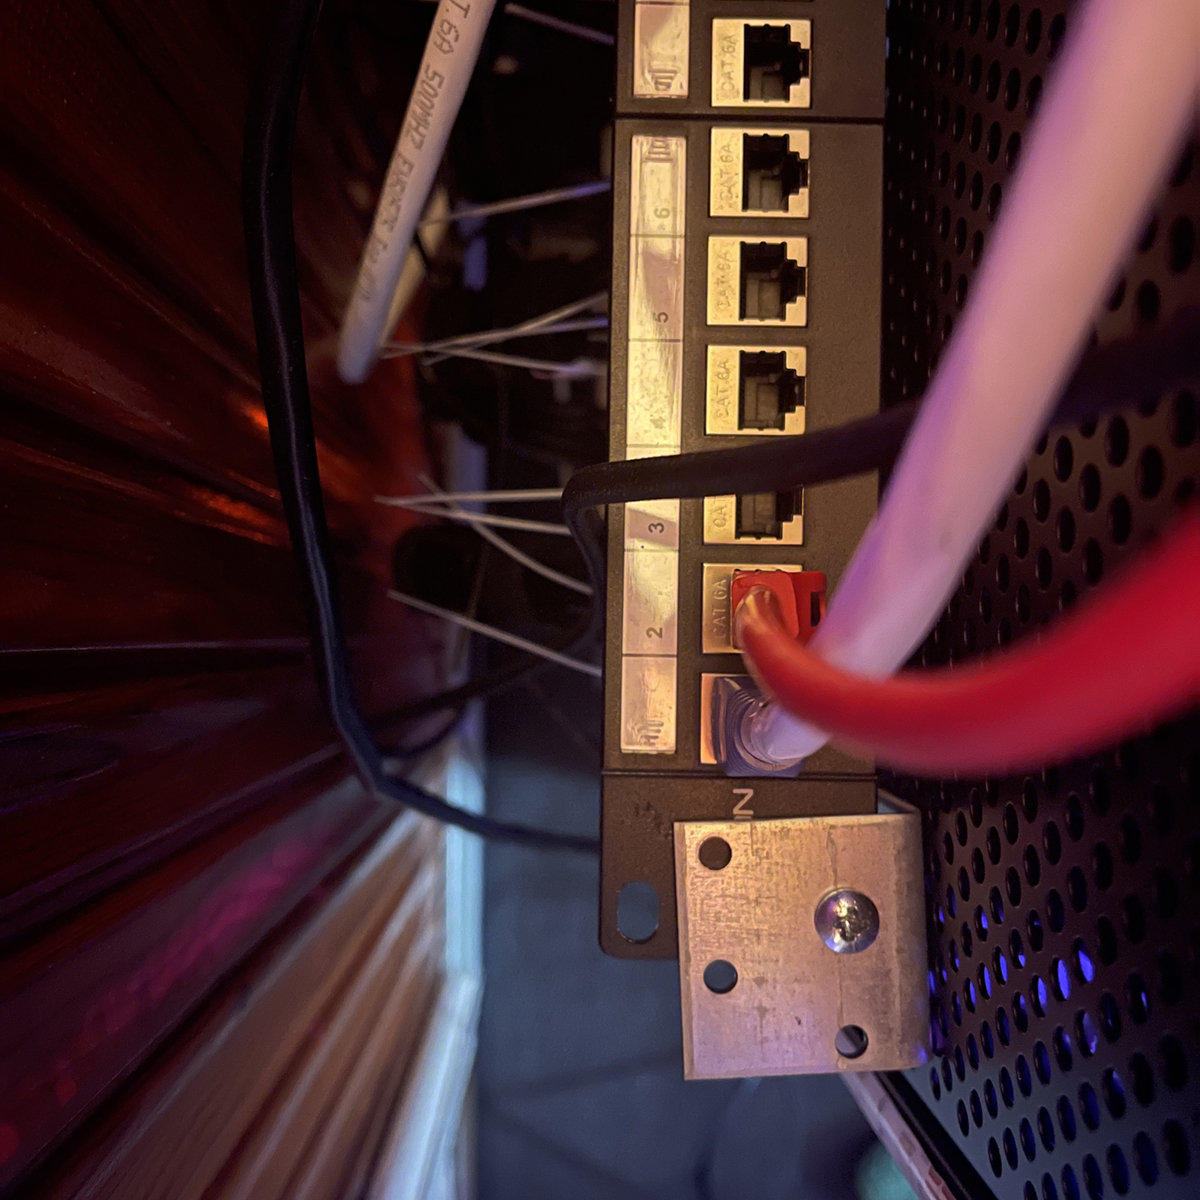
The rack cabinet has it's own power extension cord and a labeled 24xRJ45 keystone patch panel at the back, making it's easy to disconnect everything and move the cabinet (for example during cleaning).
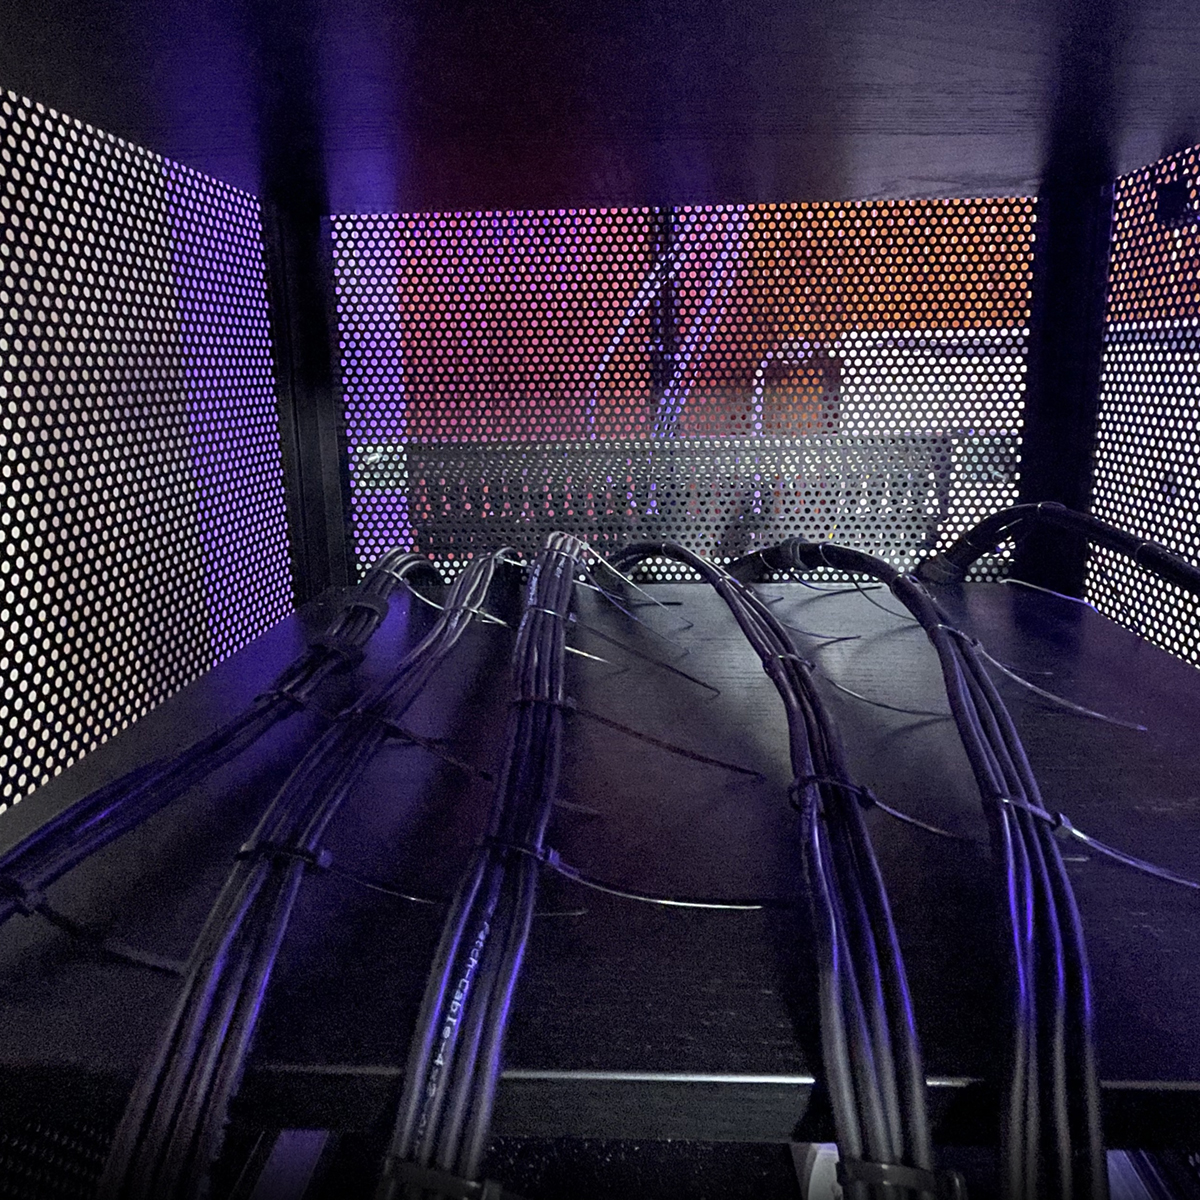
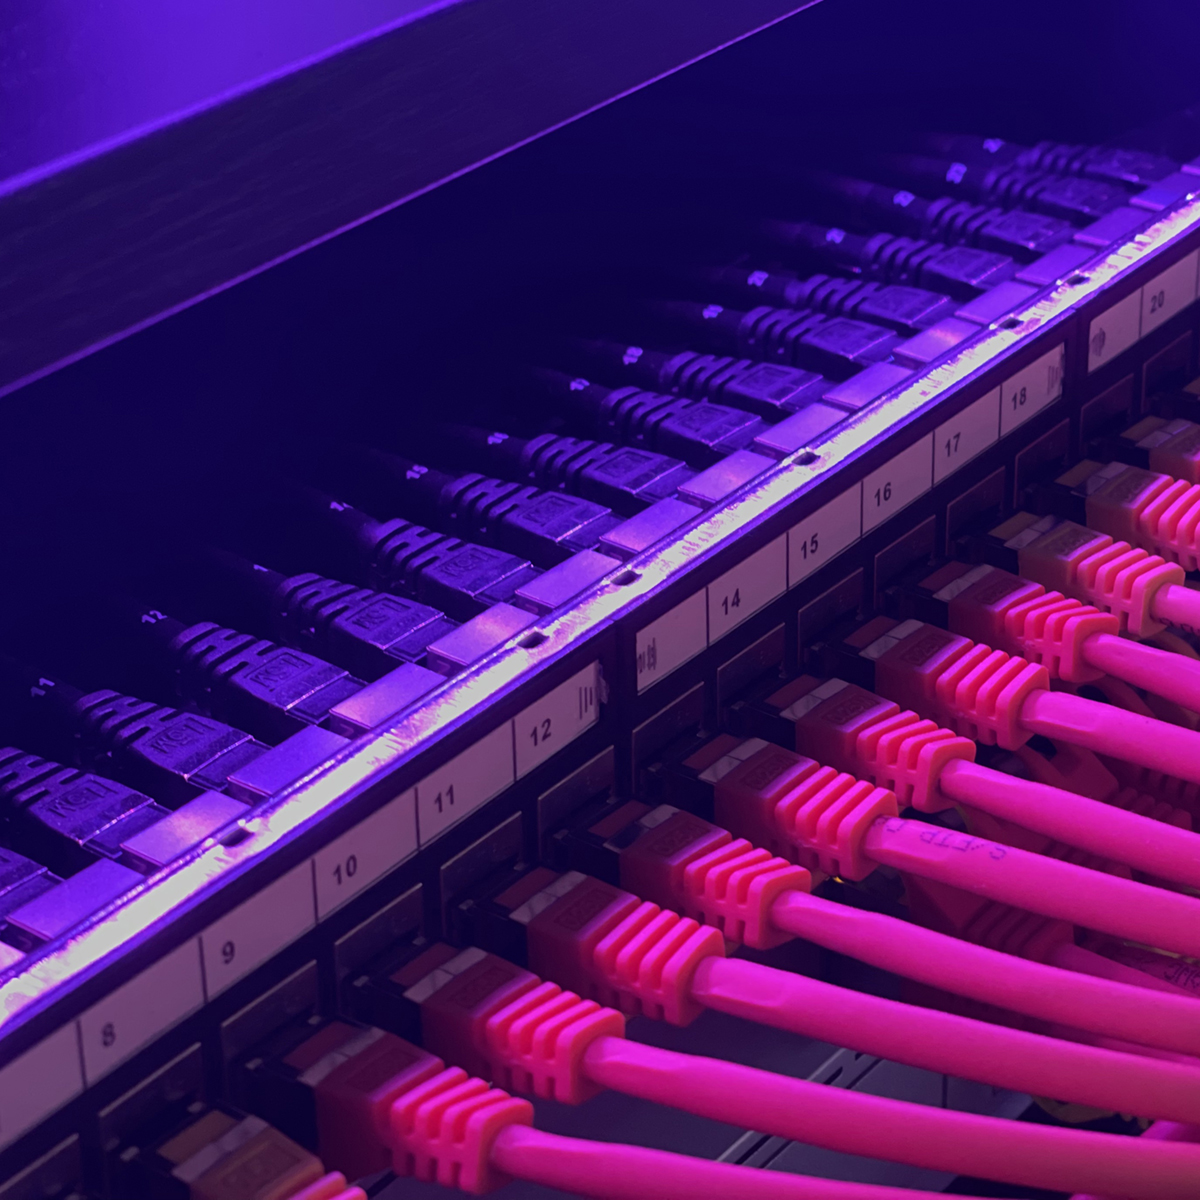
In the backside of the cabinet, I've cut an inlet hole to pass through short Cat6A cables, which then are connected into a rack mounted 24xRJ45 keystone patch panel, to which I've connected my switching gear with some nice looking coloured cables).
I could've connected the back-side patch panel directly to switching gear to save some money, instead I went after more flexible and cool looking setup! 😎
The final result!
Ikea Fjällbo cabinet with a StarTech 6HE rack containing all my rack-mountable gear – with RGB LED lighting strip of course!

Switching 
In the rack cabinet, I have my primary LAN switch with 16x Gigabit (including 8x PoE) RJ45 LAN ports and 2x Gigabit SFP ports.
Also in the rack is my “main appliance” with LAN switching for 8x Gigabit RJ45 ports & 1x 10 Gigabit SFP+ port and it also has separate WAN connectivity with 1x Gigabit RJ45 & 1x 10 Gigabit SFP+ ports.
The main appliance and primary LAN switch are connected via SFP cable.
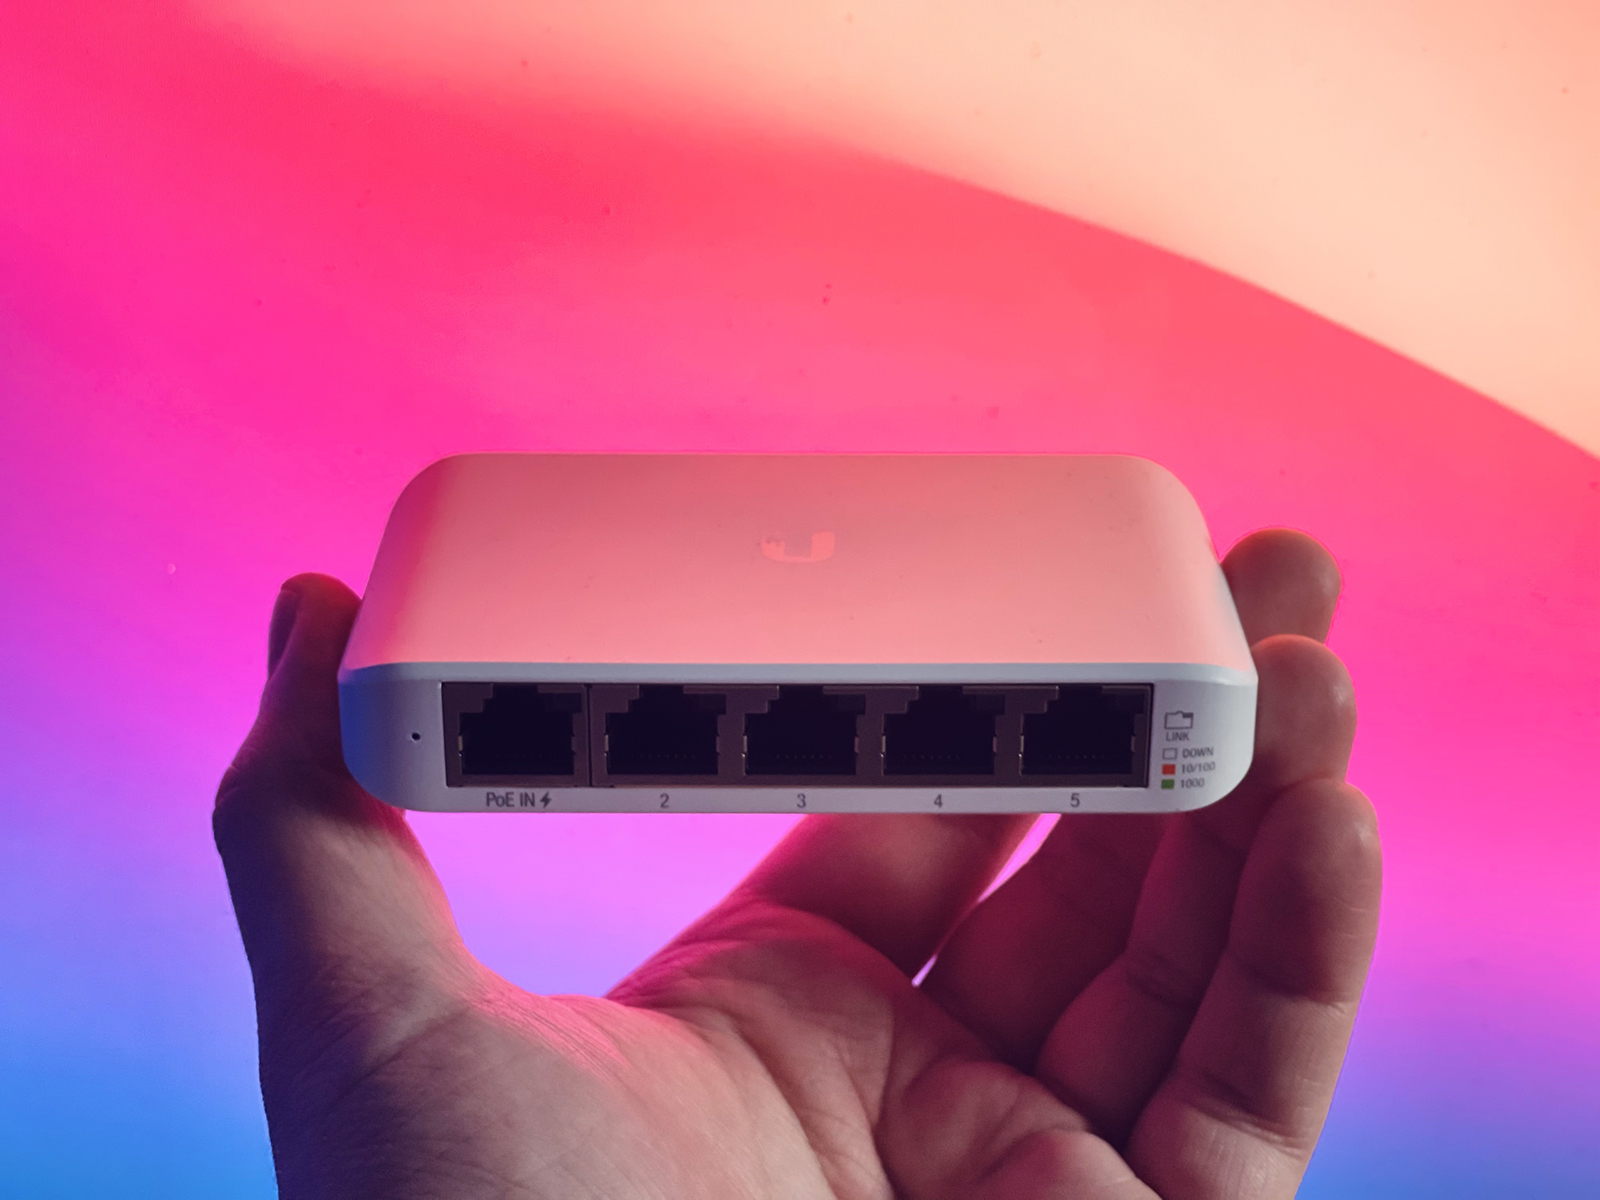
Since this is a three-story house with multiple rooms, I needed some additional switches in couple rooms: I purchased 3x UniFi Flex Minis. These managed little 5 port switches are powered by PoE and are relatively inexpensive – around 30 euros a piece!
The Gear 
Pretty much everything used in this project:
| Manufacturer/Model | Description |
|---|---|
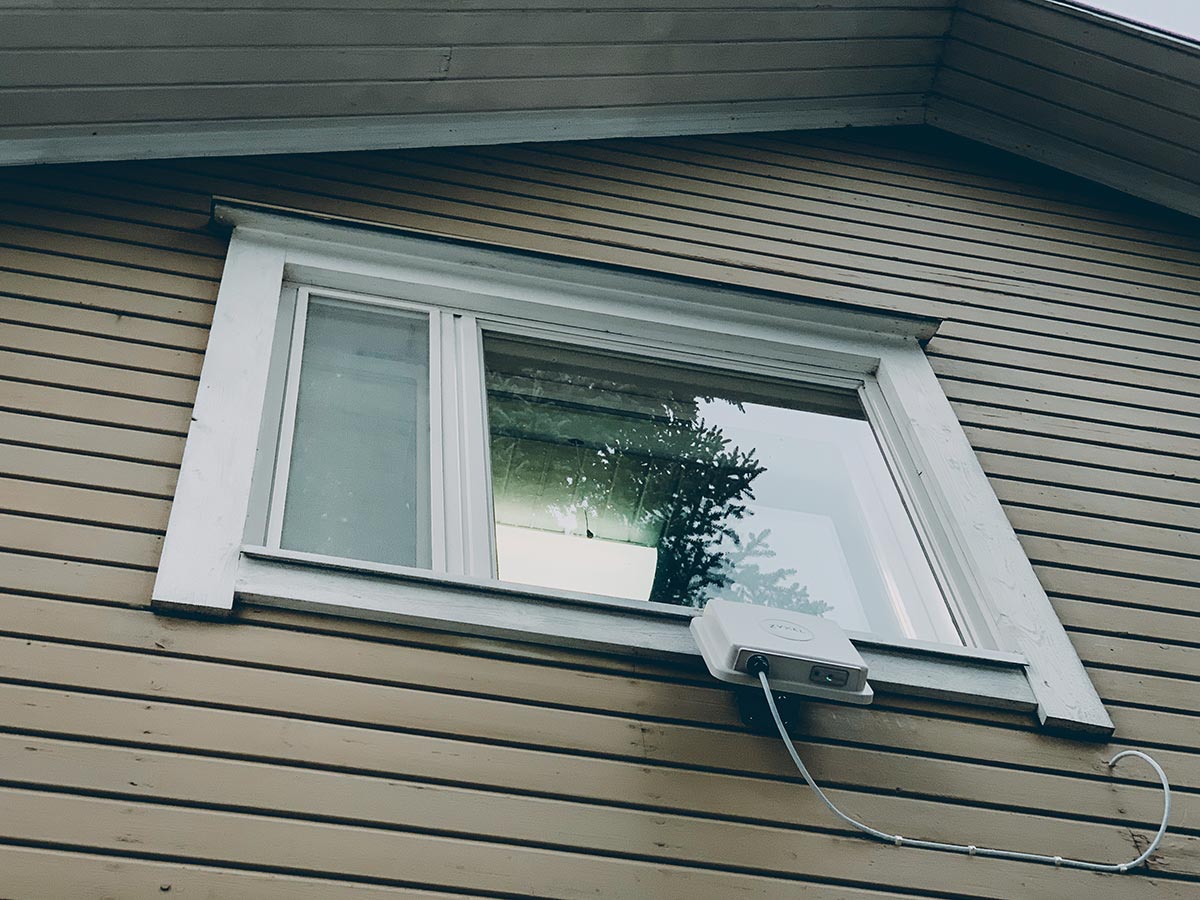
| Zyxel LTE7480 |
4G LTE Outdoor Router, up to 600/100Mbps.
|
| UniFi Dream Machine Pro | Main Network Appliance containing UniFi Security Gateway, CloudKey and Network Management functionality. LAN switching for 8x Gigabit RJ45 ports & 1x 10 Gigabit SFP+ port. WAN connectivity via 1x Gigabit RJ45 or 1x 10 Gigabit SFP+. |
| UniFi Switch 16 PoE |
16 port Gigabit switch with 8x Power-over-Ethernet POE+ IEEE 802.3af/at ports and 2x SFP ports. Used as a main switch.
|
| 3x UniFi Flex Mini | 5 port Gigabit switch powered by PoE. To provide switching in different rooms. |
| UniFi AC Pro |
WiFi access point, 802.11ac.
|
| UniFi AC-M |
2x2 MIMO outdoor Mesh access point, 802.11ac.
|
| Deltaco cable reel |
100 meters, Cat6a, F/FTP, LSZH, Awg23.
|
|
Deltaco cable reel for outdoors |
100 meters, Cat6a, F/FTP, LSZH, Awg23 and specifically meant for outdoors installations.
|
| VCE RJ45 |
Crimping Connector, Cat7/Cat6a, Awg23-26.
|
| SGILE 12-in-1 | Tool set including: Crimping pliers, cable stripping tools, cable tester. |
| KLEIN TOOLS LAN Scout Jr | Better cable tester with a single test status display indicating if wiring is okay (or not): Useful when building long cables that go through walls to different rooms. |
| StarTech 6HE 19in | Wall Mount Rack for six 19" rack units. Installed inside Ikea Fjällbo cabinet. |
| 2x deleyCON 24 patch panel with Cat6A keystones | I wanted to have patch panel in the back of the Ikea cabinet and then short cables from there to patch panel in the rack unit. Because I was lazy and didn't want to build 24x cables myself, I purchased this keystone patch panel along with some ready-made 1.5m Cat6A cables. |
| Raspberry Pi 4B | Raspberry Pi 4 Model B 8GB. Just one for now, more to come later. |
| Miuzei Raspberry Pi 4 Aluminum Case | Passively cooled case & power supply. Originally I was thinking about powering the Pi via PoE, but some people in the interwebs have reported that the Pi PoE hats run quite hot and/or contain noisy fans, so I decided to go with “regular power”. |
Cabling 
I've been to many LAN-parties when I was younger (and even arrenged them myself) and some 15 years ago I had Linux servers running at my home, so of course I tought that I know all this shit. Little did I actually know about network cabling, since so far I've always used ready-made Cat-cables and this was first time for me actually building the Cat-cables myself from a cable reel with crimping tools etc.
The F/FTP cable 
Again, I am not an expert on network cabling at all, but I do know the basics about Cat5 vs Cat6 etc and I know there's cables with different kind of shielding to prevent electromagnetic interference. I decided that I'll build the network with Cat6a cables since I wanted to have a gigabit networking with several Power-over-Ethernet devices, so why not! Then I noticed that the price difference between UTP and F/FTP wasn't that bad, somewhere around 20-30 euros for 100 meter reel, so I decided “what the heck… more shielding sounds better”. And I guess it is, but what I did not realize is that working with cables that have foiling for the whole cable and for each twites pair is really fucking annoying 😅 I am not the most handy person out there, so I ended up shouting “Perkeleen Vittu Saatana Helvetti” out loud a lot during the cable builds - thankfully I live alone here in the middle of the forest so nobody is around here to call the police due to me being a noisy neighbour.
I guess it's safe to say you probably are better off buying UTP cable reel for your home network, where there shouldn't be interference like there would be in some datacenter environment or similar. That's because they're easier to build, fit inside any regular RJ45 connector, are easier to bend and they're also a bit cheaper to buy.
For some people questioning my choice of F/FTP cabling (and righly so), I've just answered that “the forest I live in is quite mythical and there's a lot of cosmic radiation” 😝
American Wire Gauge 
Second lesson for me was about American Wire Gauge (or AWG for short) wire dimensions, I did not know anything about them beforehand. I've always thought that all Cat-cables have same size conducting wire and they'll fit any RJ45 connector. Little did I know. I had initially purchased just a batch of random RJ45 connectors from a local store, but during the cable build are realized the conducting wires absolutely will not fit into the RJ45 crimping connector. I pretty much lost faith, since everyone had said that building Cat-cables is simple and I started questioning myself that “do I really suck this bad at anything requiring practical work”. Then a friend suggested - something obvious - that they're probably just too thick wires for the connector. Remember, I've previously thought every Cat-cable has standard sized wires. I decided to cut off and peel one of my old ready-made Cat5e cables and compare the wiring, lo and behold, the wires in my F/FTP Cat6a cables were a lot thicker - of course. I started digging, and learned about AWG units, checked my cable reel specs which said AWG23 and I then ordered some RJ45 connectors supporting AWG23-26 from Amazon: Rather “surprisingly” they work fine.
After “some” struggle... a cable that works & passes the test!
Note the cheap cable tester, I recommend getting a better one (like the Klein Tools LAN scout Jr which I purchased later) with a single indicator display: It's essential when building longer cables with ends in different physical locations!
A or B? 
I had some confusion about what's the difference between T-568A vs T-568B when building straight through cables, but this video clarified it quite well:
Electrons don't care about color.
So if you're building straight through cables, just ensure both ends have the same pinout - either T-568A or T-568B, it doesn't matter which as long as both ends have the same! And of course, if you're building a crossover cable, you need to have T-568A on one end and T-568B on the other.
Now I've memorized the T-568B pinout.
Internet connection 
I literally live in the middle of nowhere, which means the internet connectivity options are limited (compared to living in a city): Currently the options are either to use pricey & slow ADSL over landline, 4G LTE or pay a big chunk of money for the ISP to dig & deliver an optical fiber to my house. Since 5G isn't available for my location yet, using 4G LTE is the only sane option. Which is exactly what I have used already for several years, but the connection speeds have been usually peaking at 60/20Mbps with ping ranging from 30ms to 50ms and often the performance wasn't stable (using the shitty cheap ISP provided indoor LTE routers).
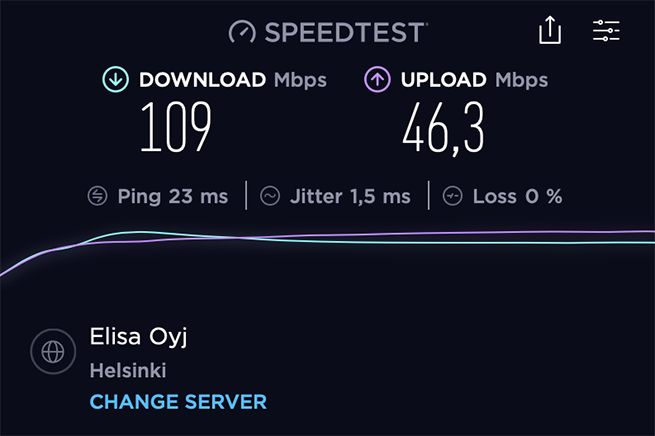
Fortunately there's actually a cell tower quite close to my home, less than 1 kilometer away. I read some good reviews about Zyxel LTE7480 outdoor LTE router, so I decided to give it a try. And I am glad I did, since it resulted in 109/46.3Mbps connection speed with 23ms ping! Initially I only had speeds around 70/25Mbps when using automatic LTE band selection, but once I locked the Zyxel modem into using B3 frequency band of my closest cell tower I was able to achieve that 109/46.3Mbps.
I still remember when I was a kid growing up here and surfing with 56Kbps dial-up modem connection, I couldn't even dream about these speeds! That being said my current internet connection has nominal speed of 300/100Mbps, it's somewhat dissapointing to “only” reach 109/46.3Mbps. I can almost see the cell tower from my upstairs window (distance of 600 meters) and Zyxel LTE7480 support speeds up to 600/100Mbps. I even checked with my ISP - Elisa as their “reception map” shows my location with 300/100Mbps supported, but they just said the usual generic execuse of “the nominal speed is not guaranteed and the actual speed depends on multiple factors”... 🤷♂️
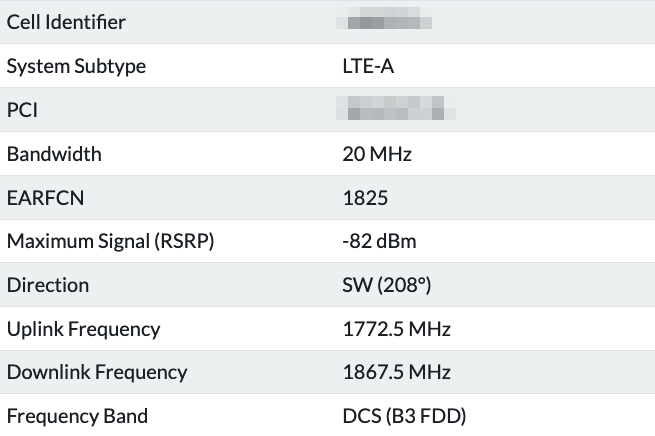
B3 frequency band of my closest cell tower (which I figured out from CellMapper).Choosing UniFi 
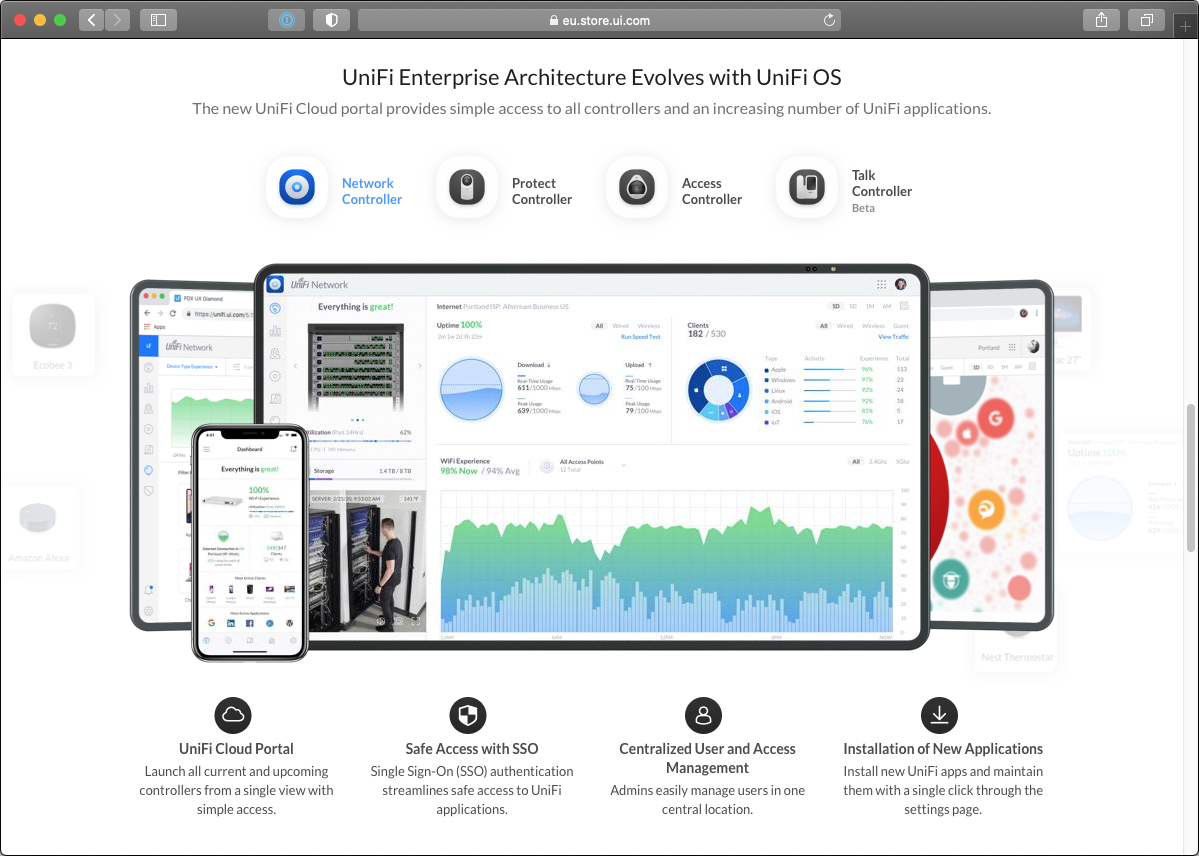
I've always hated the clunky management interfaces of consumer network hardware. They're always an afterthought with shitty user experience. Though it makes sense, since normal people won't probably ever use the “admin view” unless there's some problem.
I wanted to have a networking solution that provided a lot of features bundled into a nice user experience and it seems that Ubiquiti UniFi product range ticks those boxes. UniFi is aimed for the enterprise offering a lot of features but has an Apple-esque design and user experience (in both hardware and UniFi OS management interface & mobile apps). There have been few security issues with UniFi in the past but I'd say every manufacturer has had some and also I'd bet choosing UniFi improved my network security a lot compared to those old shitty & cheap ISP-provided routers!
Future-proofing 
-
Lots of ports: The rack cabinet (containing my UniFi switching gear) has 24
Cat6Agigabit ports for connectivity and – this being a three-story house – I've distributed three Flex Mini switches around the house. There's already fair amount of devices connecting via ethernet cable (instead of WiFi), but I'll most probably have more of those in the near future: CalDigit docks for all the laptops, a NAS-solution (backups & fileshare) and multiple Raspberry Pis! -
Power-over-Ethernet: I currently have only few PoE devices, but I now that I've purchased the UniFi PoE switch I suspect I'll have more Power-over-Ethernet devices in the future.
-
UniFi Protect: I currently utilize multiple Logitech Circle 2 and Circle View security cameras with Apple Homekit Secure Video, which for outdoors work great since one can set alarm notifications only for vehicles and persons (ignoring the animals, which there are plenty here). But the UniFi G4 Pro security cameras do seem to provide far better footage with 4K and good lenses, so UniFi Protect might be a good option in the future and the UDM Pro already supports acting as the Network Video Recorder for UniFi cameras (I'll just have to add in a harddrive). And they should even work with Apple HomeKit via
homebridge-unifi-protect. -
Site-to-Site VPN support: I do not currently use it, but since during normal times I split my time between two places, I think this feature could be interesting option if at somepoint I would purchase UniFi gear into my (future) Helsinki apartment.
Cost 
UniFi network appliances are expensive, but then again there are people that spend close to 400€ for things like “gaming routers”, so I would argue that I am not that unique of a nutjob 😅 I also expect this setup to last quite some time: I don't see any reason why I should have to upgrade this UniFi network setup within - let's say - next 10 years, which partly “justifies” the cost.
The most expensive part was the UDM Pro which is in charge of controlling and configuring the whole network; Then again it combines Unifi Cloud Key for remote management, Security Gateway and a gigabit switch (with IDS/ IPS), which purchased separately would add up to several hunders of euros.
My current PoE devices came with PoE-injectors, but I spotted an offer for USW-16-POE Gen2 switch in Amazon.de for 240€ (Finnish online stores sell it for whopping 370 euros), so I decided to take advantage of that Amazon offer and purchase the PoE switch as well, even though I didn't currently absolutely require it.
For the WiFi mesh, I spent around 250 euros in total (for 1xAC-Pro and 1xAC-M) which I think isn't that bad considering one can easily spend anything from 200 euros up to 1000 euros on a WiFi mesh regardless of the brand.
Network Topology 
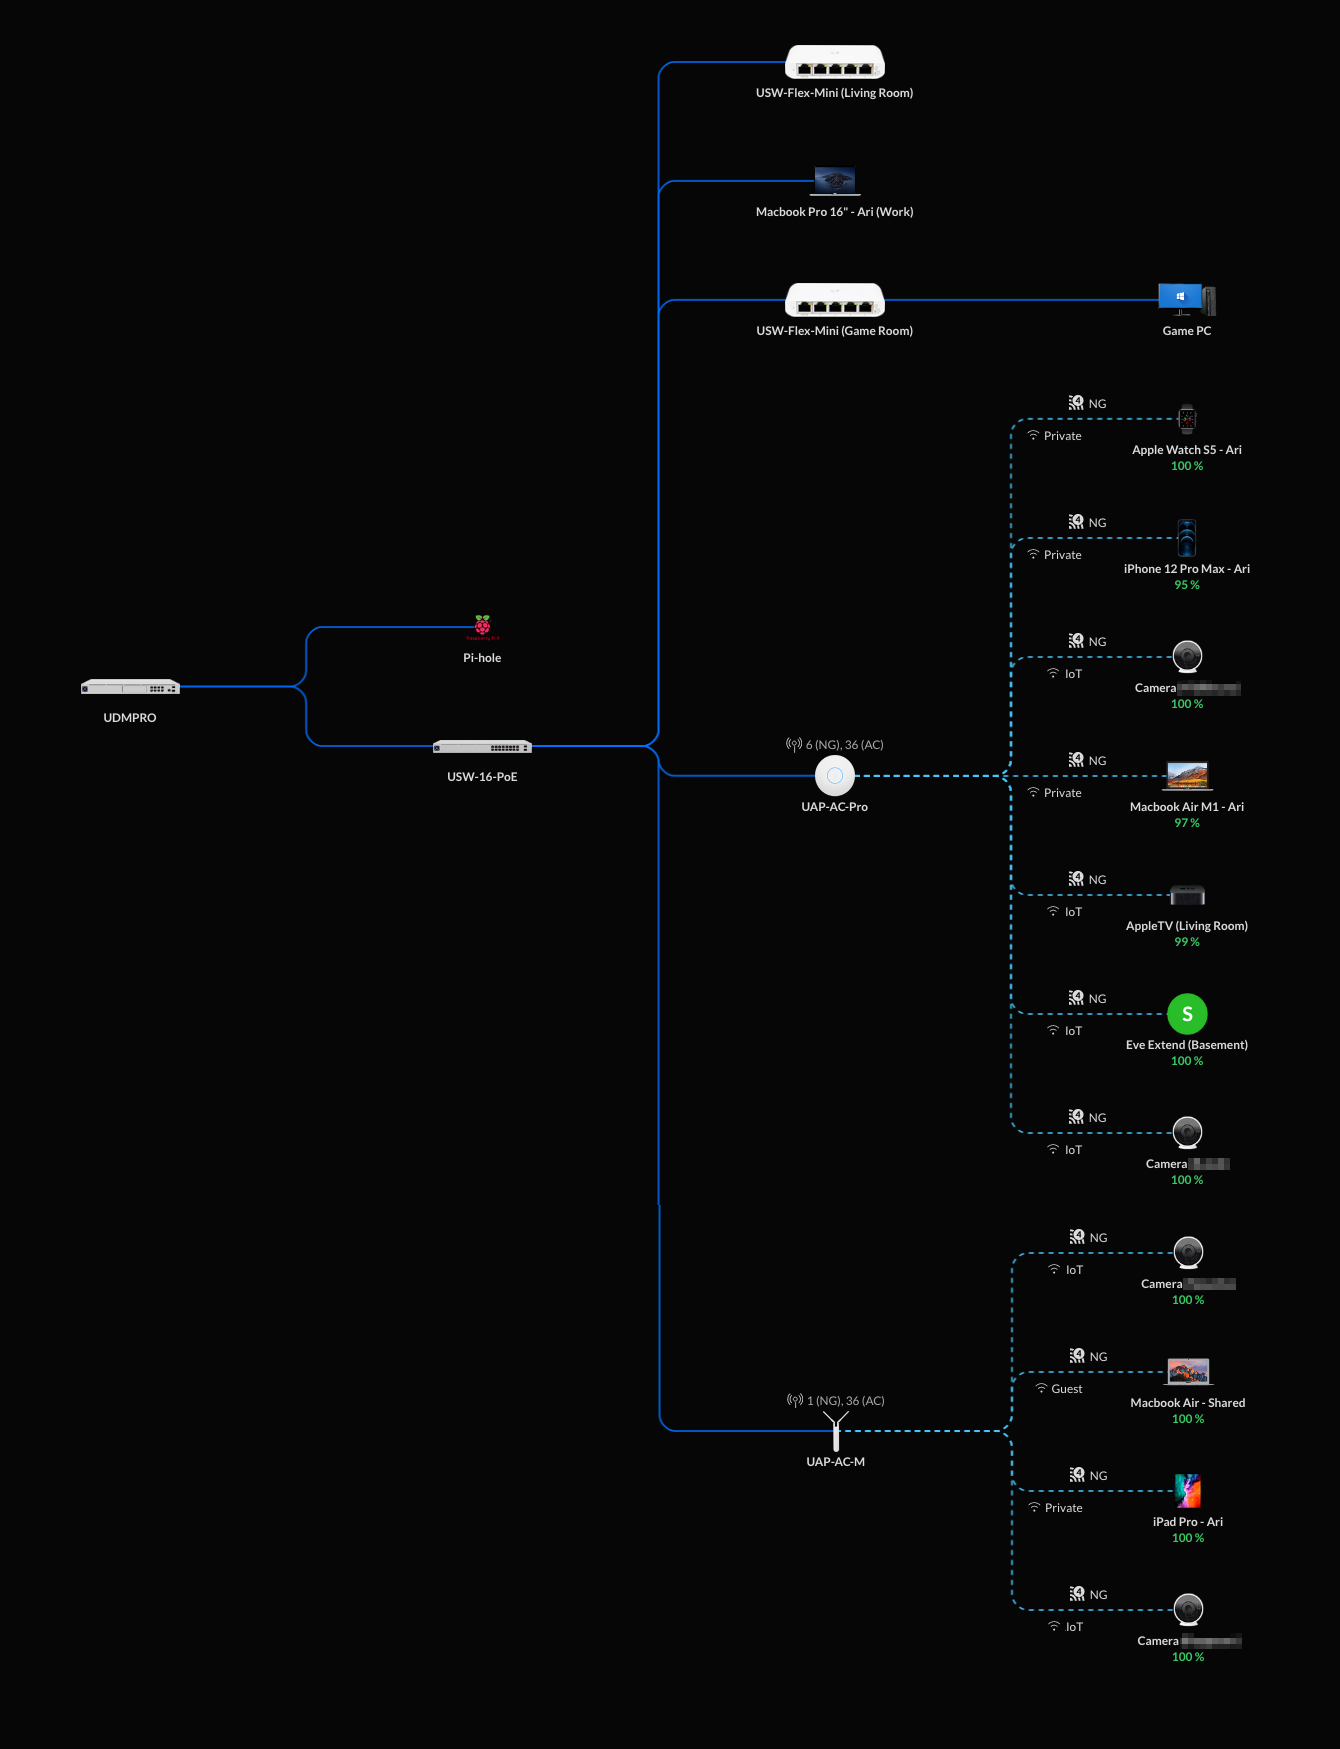
Networks 
Devices in IoT network can't access other networks and devices in Guest networks can only access internet, but no other networks and not event other devices within the network.
| Network type |
WiFi 2GHz |
WiFi 5GHz |
Visible SSID |
Password Policy |
Bandwidth limitation |
Intended usage |
|---|---|---|---|---|---|---|
Guest Default |
✓ | ✓ | ✓ | medium | 20/10 Mpbs |
Guest devices (friends & family) |
VIP Guest High Speed |
✓ | ✓ | medium | 50/30 Mpbs |
Guest devices (specific users) |
|
IoT |
✓ | strong | Security Cameras, sensors... | |||
Private |
✓ | strong | Everything else (my devices only) |
Guest WiFis 
Some might wonder the need for specific guest WiFis in home use, but I often have friends & family staying over for extended time; During the pandemic I've even had few friends over here who work/study remotely (while I'm also working remotely), so I want to provide a faster network connectivity to them. Consider them as “VIP guests” 😎

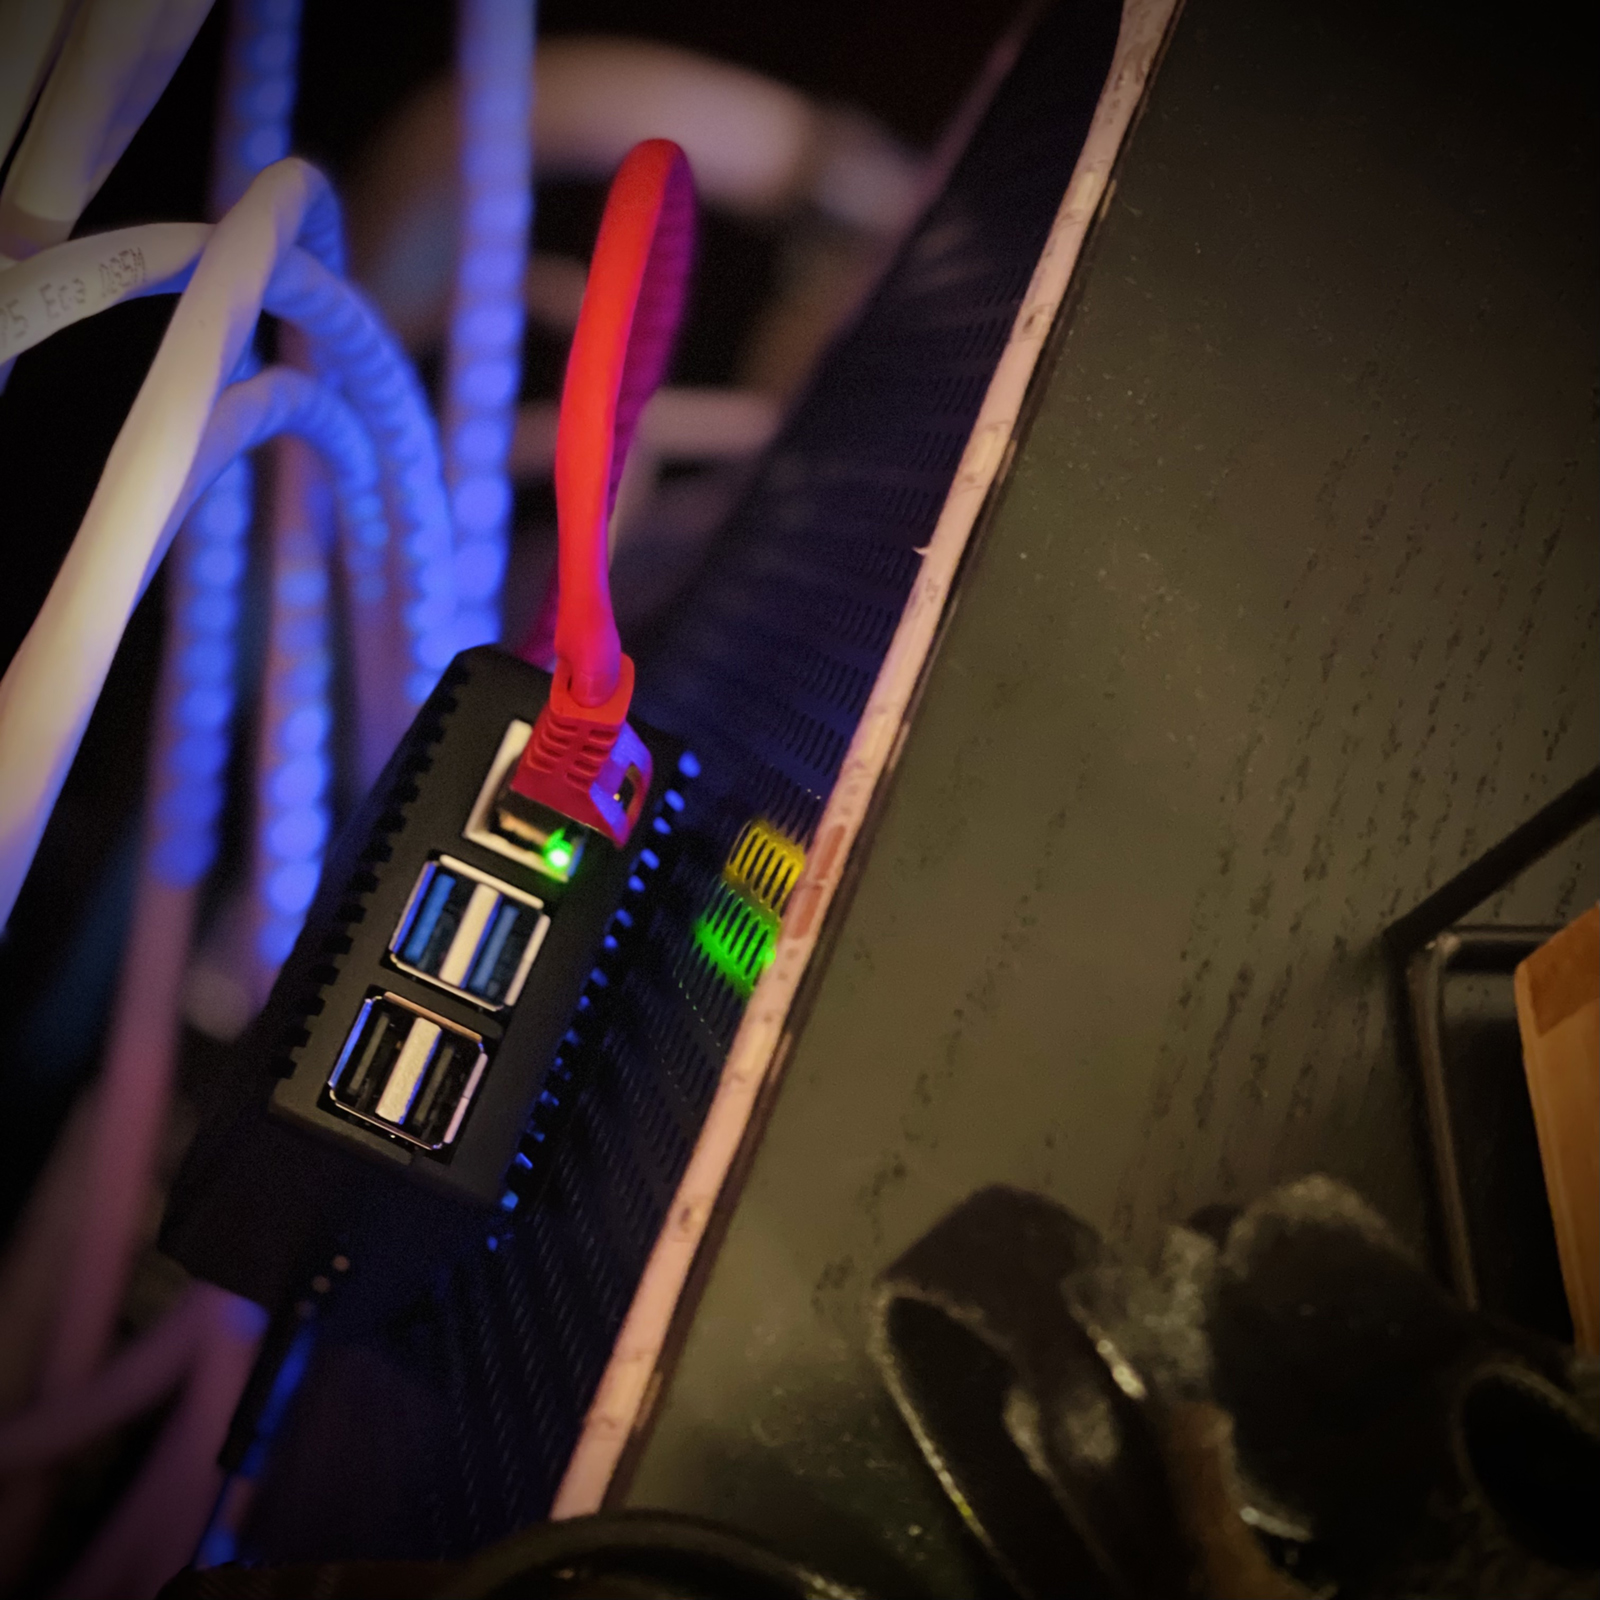
DNS 
I installed Raspberry Pi with Ubuntu Server configured with automatic patch updates, Pi-hole and Unbound as recursive DNS server. Once installed, I configured Unifi UDM Pro to use the Raspberry Pi as the primary DNS server for the whole network, resulting in network level ad-blocking. For secondary DNS I use 9.9.9.9.
And yes, I see the irony: I work for a company that has multiple products relying on advertisement sales! But I don't consider myself as a person who makes that many purchase decisions based on seeing an ad, so I think it's fair. When I need to see the ads for work, I can always enable the company VPN which bypasses the network DNS setting!
FAQ 
Some reasoning behind this project and answers to questions that several people have already asked:
- Was all this setup effort and cost necessary for a home network?
No, Absolutely not! I just wanted to set things up like this just for the fun of it and to learn a bit more about networking during the process.
- Do you really need Gigabit ethernet and enterprise-class IDS/IPS etc in the internal home network?
No, Absolutely not! But I say “why not?” - At least it'll cover all my networking needs for years to come and anyway the whole project pretty much can be summed up with “anything worth doing is worth overdoing”.
- Why 4G LTE internet connection? Why not fiber?
Cost. My home is in quite remote location: I did ask the local ISP - Elisa - an offer for optical fiber connection, they waited two weeks and replied that the installation would cost 10 000€ (12 000 USD), so that was a “bit” too steep price for me currently…
- Why not wait for 5G?
Currently one can get 5G connections about 10km out of my place, but since my home is truly in the middle of a forest, I suspect the cell tower in our village won't get 5G in next couple of years and also one can't buy good 5G outdoor router like the Zyxel NR7101 yet, at least in Finland at the time of writing this, so again, I decided not to wait and instead improve the situation with current tech for next few years.
- Why bother with this Gigabit local network since the internet speed via 4G is a bottleneck?
Well there isn't much point to buy
100Mbps devices these days anyway. Also future-proofing: Since I hope that in couple of years I'll have access to 5G or you never know if someday there might be fiber connection available with slightly reasonable pricing. - Why not WiFi6 – i.e. why not Unifi
U6-LR?When I started this project, the WiFi6 enabled
U6-LRwasn't available from Ubiquiti yet. I decided not to wait for it since most of the client devices in my network do not support WiFi6. I may purchaseU6-LRlater in the future to enable WiFi6 and to cover few WiFi blindspots (this is a somewhat big house with a big outdoor area around it).
Summary 
So far, I'm very satisfied with this setup though there's probably lot to improve on. I still need to do some more cabling work to provide ethernet to couple other rooms, play more with VLANs, firewall rules and such!
Would I recommend this kind of a project for others? No, not really: Most of the stuff I've done & purchased are completely overkill for a home use! Only setup something similar to your home if you enjoy this kind of stuff (as I do) 😅 For regular home users interested in Ubiquiti UniFi products, I'd recommend the “non-pro” UniFi DreamMachine with integrated WiFi access point!